1. 프로젝트 생성
1) 기본 세팅
- Java 17
- Spring 3.0부터는 Java 17 버전 이상만 지원 가능하기 때문에, Java 17 버전으로 다운로드를 받습니다.
- https://www.oracle.com/java/technologies/downloads/#java17
Download the Latest Java LTS Free
Subscribe to Java SE and get the most comprehensive Java support available, with 24/7 global access to the experts.
www.oracle.com

- 환경 변수 설정
- Window + R → sysdm.cpl로 시스템 속성에 진입합니다.
- 고급 → 환경 변수 → JAVA_HOME 시스템 변수를 설정합니다.

2) 프로젝트 생성
- 스프링 부트 스타터 사이트로 이동하여 스프링 프로젝트를 생성합니다. (https://start.spring.io/)
- 프로젝트 선택
- Project: Gradle - Groovy Project
- Spring Boot: 3.x.x
- Language: Java
- Packaging: Jar Java: 17 또는 21
- Project Metadata
- groupId: hello
- artifactId: hello-spring
- Dependencies: Spring Web, Thymeleaf
- Generate 후 원하는 폴더에 압축 파일을 해제합니다.
3) 프로젝트 실행
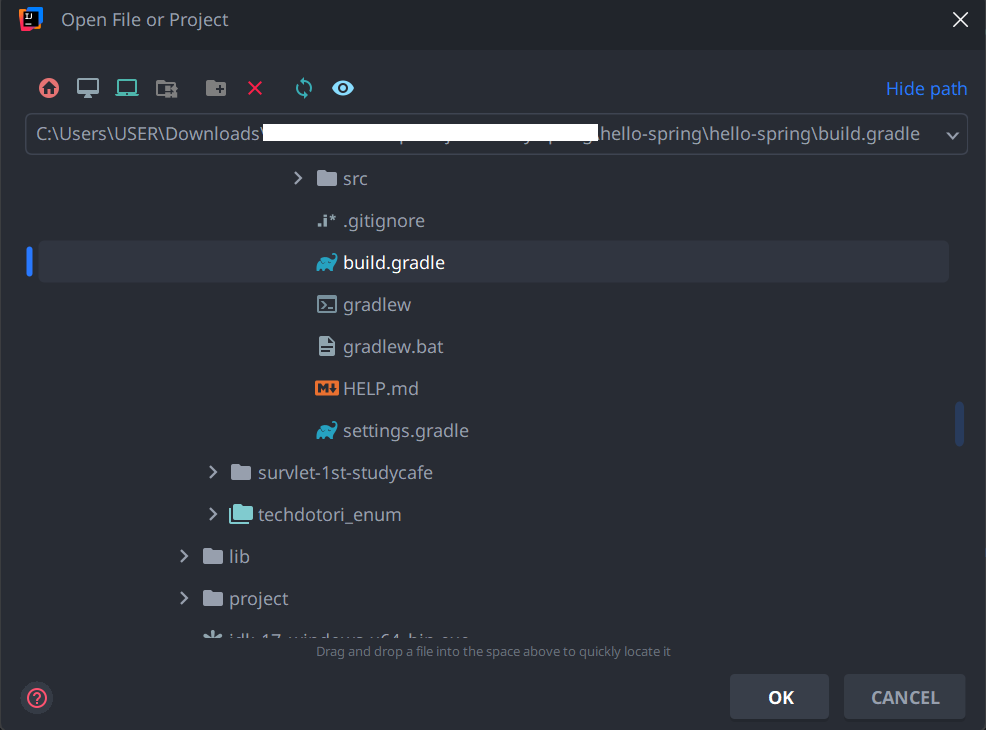
- IntelliJ에서 File > Open > build.gradle을 open합니다.
- Project Structure(Ctrl + Alt + Shift + s): SDK 17로 설정합니다.

- Settings(Ctrl + Alt + s)
- Gradle JVM: 17로 설정합니다.
- Build and run using, Run tests using: IntelliJ IDEA로 설정합니다.
(Gralde을 사용하는 것보다 더 빠른 속도로 애플리케이션을 빌드하고 실행할 수 있습니다.)

- hello-spring > src > main > java > hello.hello_spring > HelloSpringApplication을 실행합니다.

- 아래와 같이 Tomcat - localhost:8080 실행된 것을 확인할 수 있습니다.


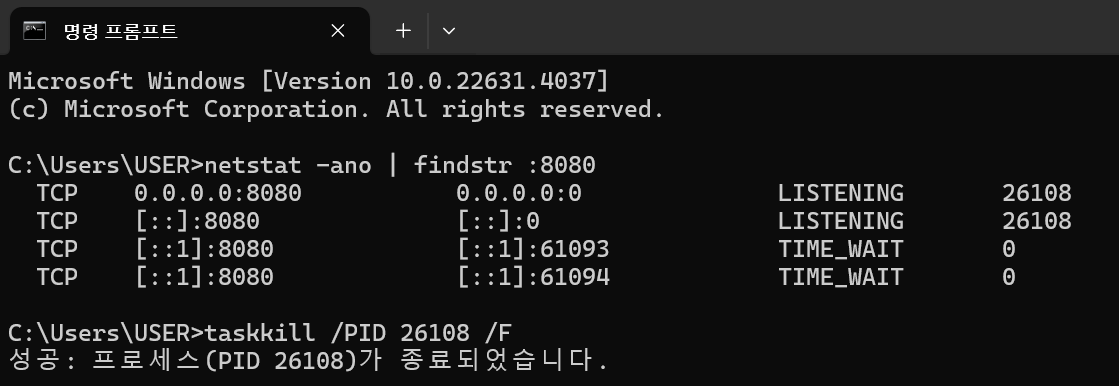
- ⚠️'Web server failed to start. Port 8080 was already in use.'⚠️
- 만약 8080 port를 이미 사용하고 있다면 cmd 창에서 아래와 같이 조회 후 taskkill 명령어를 입력하여 강제 종료시킵니다.
- netstat -ano | findstr :8080
- taskkill /PID <PID> /F
2. 라이브러리 살펴보기
1) dependencies
dependencies {
    implementation 'org.springframework.boot:spring-boot-starter-thymeleaf'
    implementation 'org.springframework.boot:spring-boot-starter-web'
    testImplementation 'org.springframework.boot:spring-boot-starter-test'
    testRuntimeOnly 'org.junit.platform:junit-platform-launcher'
}
2) External Libraries
- Gradle이나 Maven 같은 빌드 툴은 의존관계를 관리해 줍니다.
- spring-boot-starter-web 라이브러리만 땡기면, 이와 관련하여 필요한 tomcat, spring mvc를 땡겨옵니다. (필요한 의존관계를 다 가져와 준다고 생각하면 쉽습니다. 나중에는 spring-core까지...!)
- 핵심 라이브러리
- spring-boot-starter-web
- spring-boot-starter-tomcat: 톰캣(웹서버)
- spring-webmvc: 스프링 웹 mvc
- spring-boot-starter-thymeleaf: 타임리프 템플릿 엔진(view)
- spring-boot-starter(공통): 스프링 부트 + 스프링 코어 + 로깅
- spring-boot
- spring-coore
- spring-boot-starter-logging
- logback, slf4j
- 테스트 라이브러리
- spring-boot-starter-test
- junit: 테스트 프레임워크
- mockito: 목 라이브러리
- assertj: 테스트 코드를 좀 더편하게 작성하게 도와주는 라이브러리
- spring-test: 스프링 통합 테스트 지원
- spring-boot
- spring-boot-starter-web
3. View 환경설정
1) Welcome Page 만들기 (정적 파일)
- src > resources > static > index.html (정적 페이지)
<!DOCTYPE html>
<html lang="en">
<head>
    <title>Hello</title>
    <meta http-equiv="Content-Type" content="text/html; charset=UTF-8" />
</head>
<body>
Hello
<a href="/hello">hello</a>
</body>
</html>
- 강의를 보지 않고도 spring welcome page를 어떻게 만들어야 하는지 궁금하면?
- spring.io > Spring Boot > Learn > 원하는 버전의 Reference Doc.선택합니다.

- Search에서 원하는 키워드를 검색하여 내용을 확인합니다.

2) Thymeleaf (템플릿 엔진)
- 정적 페이지를 Thymeleaf로 템플릿을 설정하여 화면을 구성할 수 있습니다.
(동작하고 프로그래밍되는 화면을 만들어보자!) - src > main > java > hello.hello_spring > controller 패키지 생성 > HelloController 클래스 생성
package hello.hello_spring.controller;

import org.springframework.stereotype.Controller;
import org.springframework.ui.Model;
import org.springframework.web.bind.annotation.GetMapping;

@Controller
public class HelloController {
    @GetMapping("hello")
    public String hello(Model model) {
        model.addAttribute("data", "Hello!");
        return "hello";
    }
}- src > main > resources > templates > hello.html
<!DOCTYPE HTML>
<html xmlns:th="http://www.thymeleaf.org">
<head>
    <title>Hello</title>
    <meta http-equiv="Content-Type" content="text/html; charset=UTF-8" />
</head>
<body>
<p th:text="'안녕하세요. ' + ${data}" >안녕하세요. 손님</p>
</body>
</html>


- 템플릿 엔진의 동작 원리
- 웹 브라우저에서 localhost:8080/hello라고 던지면 → 스프링 부트는 톰캣 서버에서 get(@GetMapping)으로 받습니다.
- 스프링 컨테이너에서 helloController에 있는 hello를 return "hello";
- 위 리턴값은 resources의 hello.html을 찾아서 렌더링합니다. (Thymeleaf 템플릿 엔진이 처리)
- viewResolver: 스프링 부트 템플릿 엔진 기본 viewName 매핑
- resources:templates/ + viewName + .html
resources:templates/hello.html
- resources:templates/ + viewName + .html
- html의 ${data}는 model의 attributeValue값이 들어갑니다.
4. 빌드하고 실행하기
- ./gradlew build
- cd build/libs
- java -jar hello-spring-0.0.1-SNAPSHOT.jar
- 스프링 입문 - 코드로 배우는 스프링 부트, 웹 MVC, DB 접근 기술
https://www.inflearn.com/course/%EC%8A%A4%ED%94%84%EB%A7%81-%EC%9E%85%EB%AC%B8-%EC%8A%A4%ED%94%84%EB%A7%81%EB%B6%80%ED%8A%B8
[지금 무료] 스프링 입문 - 코드로 배우는 스프링 부트, 웹 MVC, DB 접근 기술 강의 | 김영한 - 인프
김영한 | 스프링 입문자가 예제를 만들어가면서 스프링 웹 애플리케이션 개발 전반을 빠르게 학습할 수 있습니다., 스프링 학습 첫 길잡이! 개발 공부의 길을 잃지 않도록 도와드립니다. 📣 확
www.inflearn.com
반응형


